Getting Started
Introduction
This getting started guide is written to get you up and running quickly so that you can see how Adjudicate works and get an idea of what it can do. Once you are happy with the basics as described here you will need to refer to the detailed functionality guide to discover more of Adjudicate's capabilities.
Requirements
To keep things simple, Adjudicate is designed to work typically on a single laptop without need for separate
servers or unnecessary reliance on an internet connection.
The laptop should be:
- Running MS Windows 7, 8, 8.1 or 10 (windows 10 recommended)
- Have good CPU with at least 2 cores, at least 2GB of ram and a good graphics processor
To output results you'll need a printer. The results are in colour but should look OK on a black and white printer. To complement printed output results can be published to a web browser for display on a projector, large screen or the internet.
Installation
The first task you'll need to perform is installing the software on your laptop
- Ensure you are using Internet Explorer or a current version of google chrome to browse this web site. Go to the download and install page for the version you want to install. This can be found either via the Home page or via the Release Notes page:
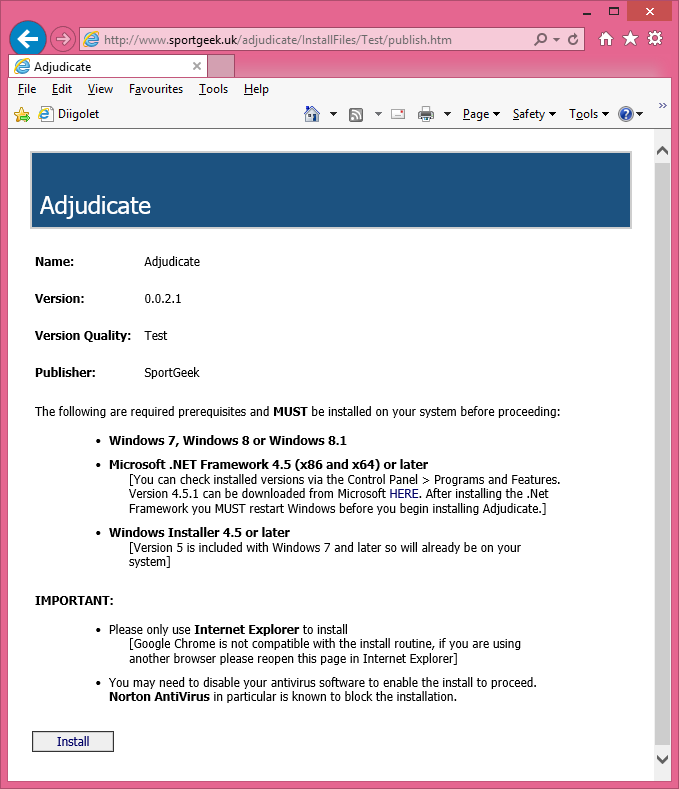
- Click the install button
- You will first see a dialog launching the application

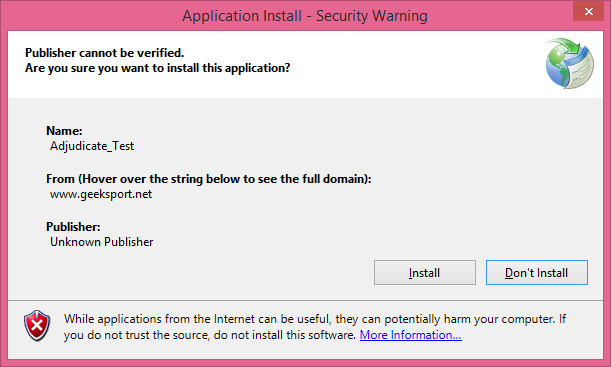
- Next you will see a security warning asking if you want to install. Click "Install".
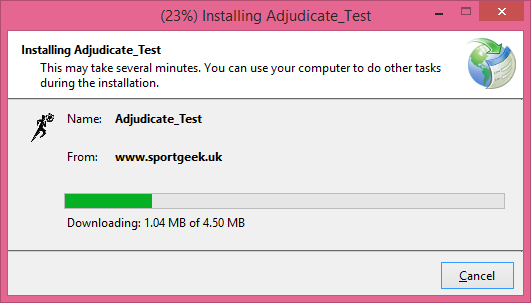
- The software will download; this is approximately 5MB so the time it takes will depend on your connection speed.
- If you are using windows 8 or windows 10 you may get this additional security message. Click "More Info"

- Then click "Run Anyway"

- The software will now install and finally the software will start up ready to be used.
Updates
Each time Adjudicate starts up on your machine it makes a quick check to see if there is a new version. If there is no internet connection or if there is no new version Adjudicate starts without prompting. However, if there is a new version available since Adjudicate was last run, it will prompt you to decide if you want to take the new update or continue with your current version. If you are about to, or are currently in the process of running a live competition then it is recommended to skip the installation of a new version just in case it introduces unexpected new behaviour. Otherwise, you can allow the new version to install and it will download the new files and update your software automatically. You should not need to confirm the security prompts again as you did for the initial installation but if you are prompted, simply confirm as before.
Basic concepts
In order to structure and control the data required to manage the results for a pentathlon competition, Adjudicate introduces some basic structural terminology. You'll need to have a basic understanding of these to get started. More detailed definitions will be added to the detailed functionality guide
- Tournament: This is simply a container to group multiple competitions.
- Competition: This is a container to group multiple classes. In most cases you will only need to have one competition in a single tournament.
- Class: Each Adjudicate class represents a class in your competition, you will need one of these for each class in your competition and they will need to be setup with the correct disciplines and rules that you want to apply as well as with competitors and teams.
- Discipline: These are the sports that competitors are taking part in. Each discipline (e.g. swim, fence, ride, combined event) is added to the classes.
- Competitor: These are the people competing. These are added to the classes.
- Team: Teams are simply defined as a list of competitors, they are typically added to a class but team competitions can be set at the competition level of the hierarchy in order to allow teams to be made up of competitors from more than one class (e.g. a mixed ladies and gents team competition).
Mock Competition - A Quick Tour
Now that you have Adjudicate running on your system you'll want to see what it can do. Adjudicate has been written to maximise flexibility and minimise complexity. With that in mind this mock competition is a demonstration of how simple it can be to set up and generate results. After a little familiarisation one could even run through the whole process in around a minute or so end-to-end. However, real life competitions, where more complex customisations to the competition format are required, may take a little (but not too much) more attention. For further details consult the detailed functionality guide.
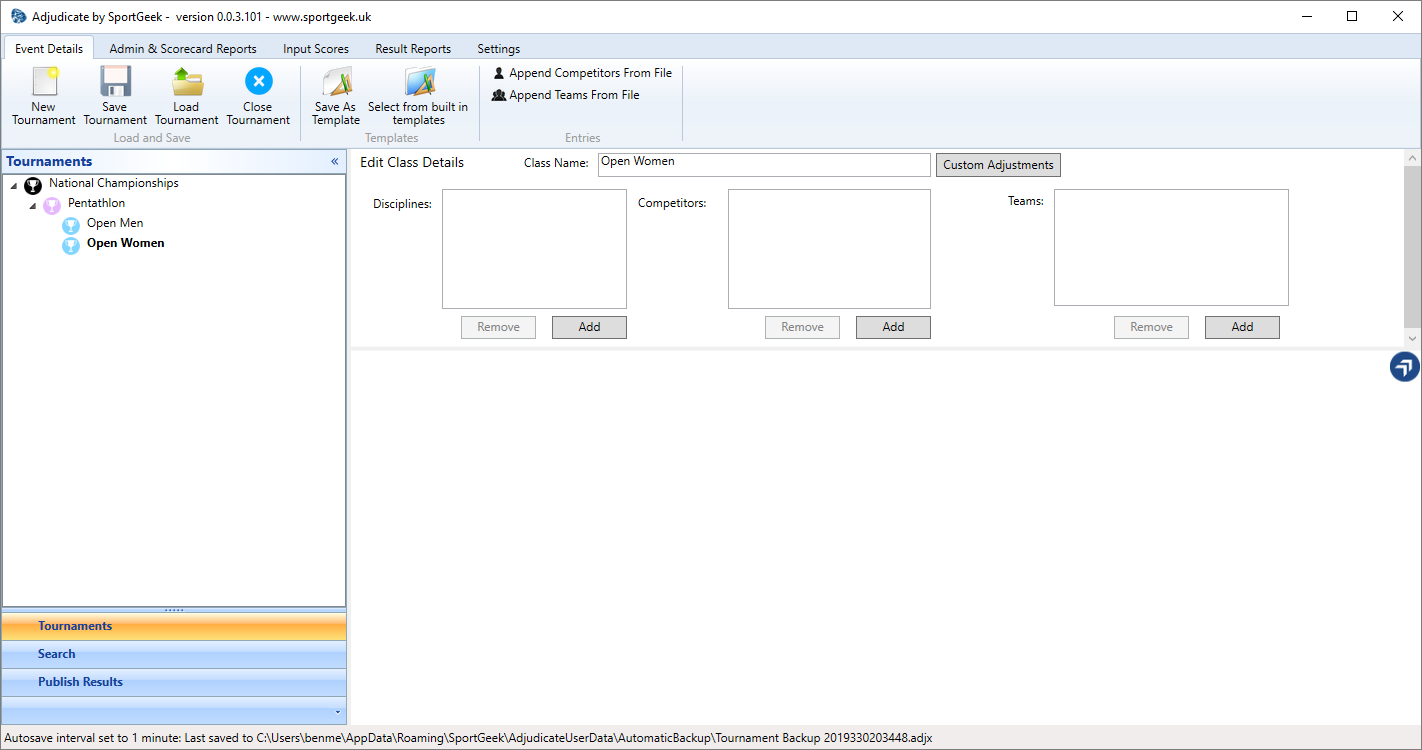
- When you first start Adjudicate you will see a screen like this:
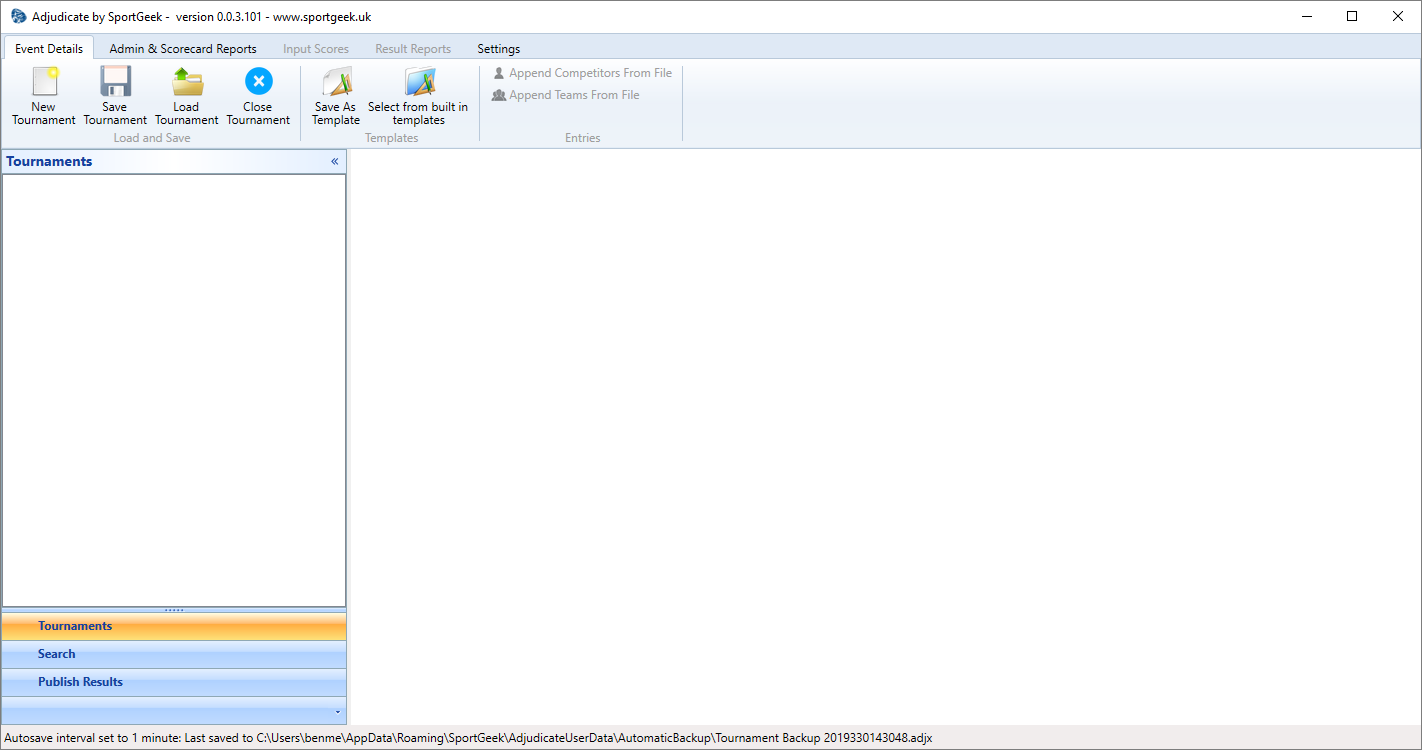
- The area on the centre left of the screen with the "Tournaments" header is called the "Tournament Explorer". From here you can control the structure of your competitions.
You will need to start by adding a tournament. Click on the "New Tournament" button:

- Once you have created a tournament a new item will appear in the tournament explorer with the caption "New Tournament". You can rename the tournament by
clicking once on the node to show the tournament details screen in the main panel in the centre of the user interface. From here the Tournament Name can be
edited and competitions can be added by clicking the "Add" button below the competitions list on the tournament details screen.

- Once you have added a competition to the tournament a new node will appear under the tournament node in the tournament explorer with the caption "New Competition".
You can rename the competition in the same way that you renamed the tournament. Click on it to show the competition details and then change the name and add a couple of classes
by clicking the "Add" button below the classes list.
- The tournament set up here is called "National Championships" and under that is a competition called "Pentathlon". The Pentathlon competition contains two classes "Open Men" and "Open Women". If the National Championships included Tetrathlon, Triathlon or Biathlon we could have set up additional competitions under the tournament to keep things well organised. On the ribbon control at the top of the screen there is a button labelled "Select from built in templates". Clicking this brings up a dialogue to allow you to select from a number of pre-defined structures. To request a template is added for your
tournament use the contact page on this website. You will need to supply all details for your event including the precise scoring rules being applied or provide a tournament file which can be generated using the "Save As Template" button. For the moment though we will define the structure ourselves.

- Now that we have the high-level structure set up we will need to look at the details. Click once on one of the class nodes to bring up the class details. As you can
see, a class can contain disciplines, competitors and teams but our new class is currently empty.
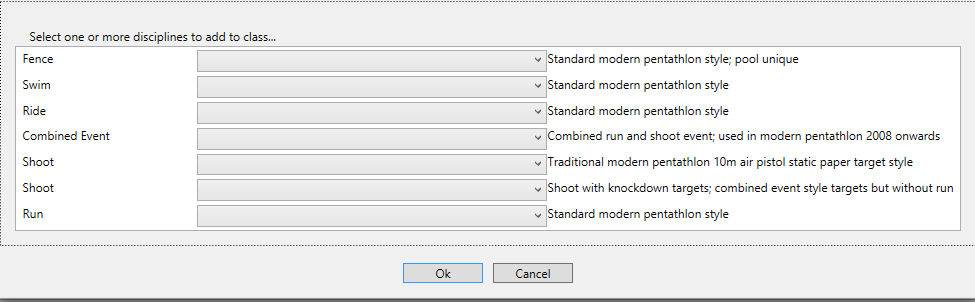
- To add disciplines to the class click on the "Add" button under the discipline list. This will bring up the following dialogue listing the supported disciplines:
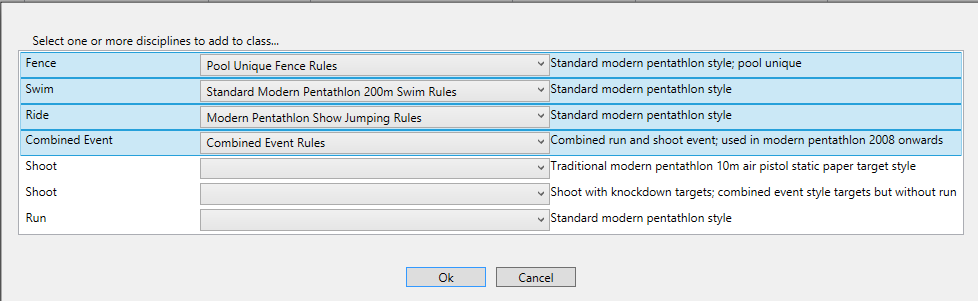
- For a standard pentathlon competition with a combined shoot/run event we select the following from the dropdowns and then click the "OK" button. The class details will be populated with the disciplines:
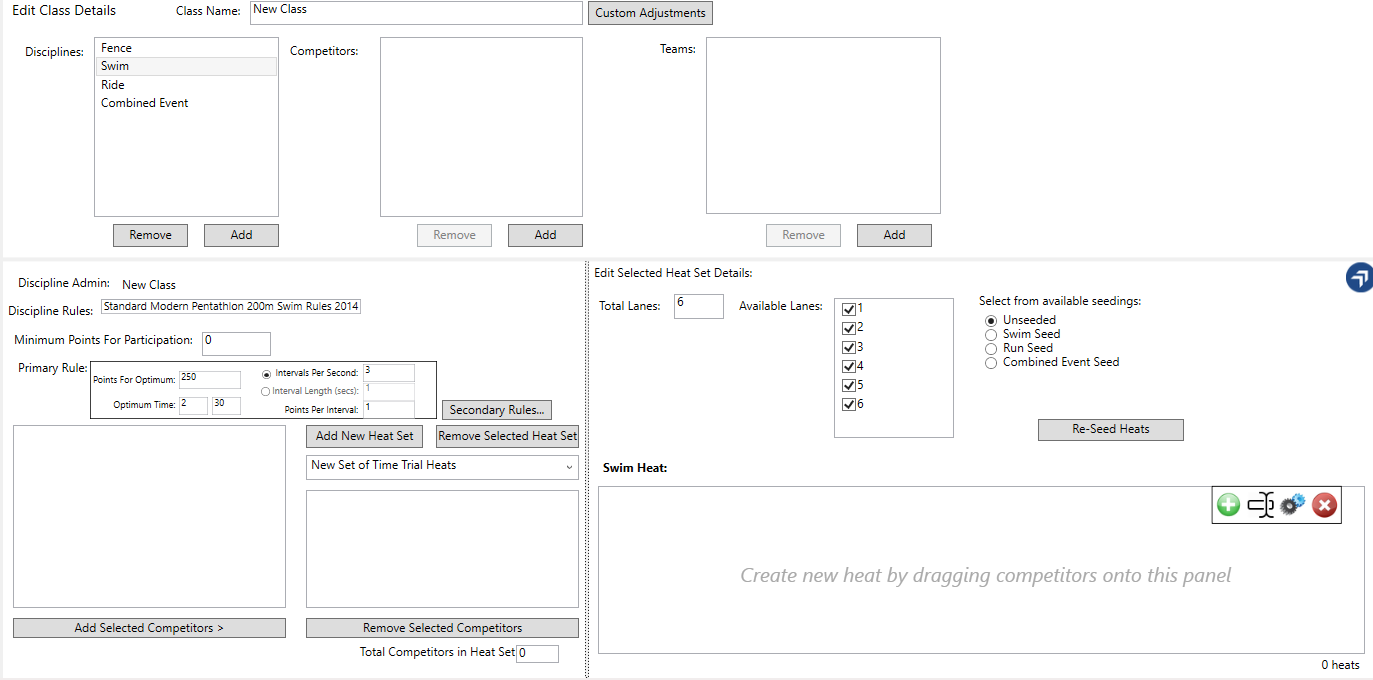
- Clicking the details button in turn will bring up details of the rules and structure for each discipline. Each one should be checked carefully to ensure all the details are correct.
For example, the swim rules in the screenshot below:
- The fence event allows competitors to be added to pools, these can then be used to calculate the bouts for each competitor (which can be viewed on the input screen and then feeds into the calculation for pentathlon points). Once competitors have been added to the pool they can be used to make fence teams, after which pool sheets can be generated. For this quick example we won't configure this as we can also enter the bouts individually for each competitor on the input screen. Refer to the detailed functionality guide for details of how to set this up.
- The ride event details page facilitates adding of competitors to show jumping courses, the setting of an optimum time and for pools of horses to be set up (optional).
The optimum time is required in order to calculate time penalties. When horses are set up these can then be allocated to riders in the data input screen and will then display on the results output. Again, we'll leave this to the detailed functionality guide as, for the moment, this is a bit of a distraction from our goal of getting some basic results displaying. - There are two ways to add competitors to the competition.
- Set up each competitor individually by clicking the "Add" button.
- Import from a CSV or Excel file with a bulk list of competitors.
- There is some flexibility on the format of the file so long as there are columns for competitor numbers. However, if your column headers match this sample file then Adjudicate will map the columns automatically for you. Download the sample file.
- Click the "Append Competitors From File" button on the "Event Details" ribbon. The open file dialog will appear.
- Select "CSV files" from the drop down and browse to the location where you saved the sample file.
- The sample file will be read in and displayed in a dialog as follows:
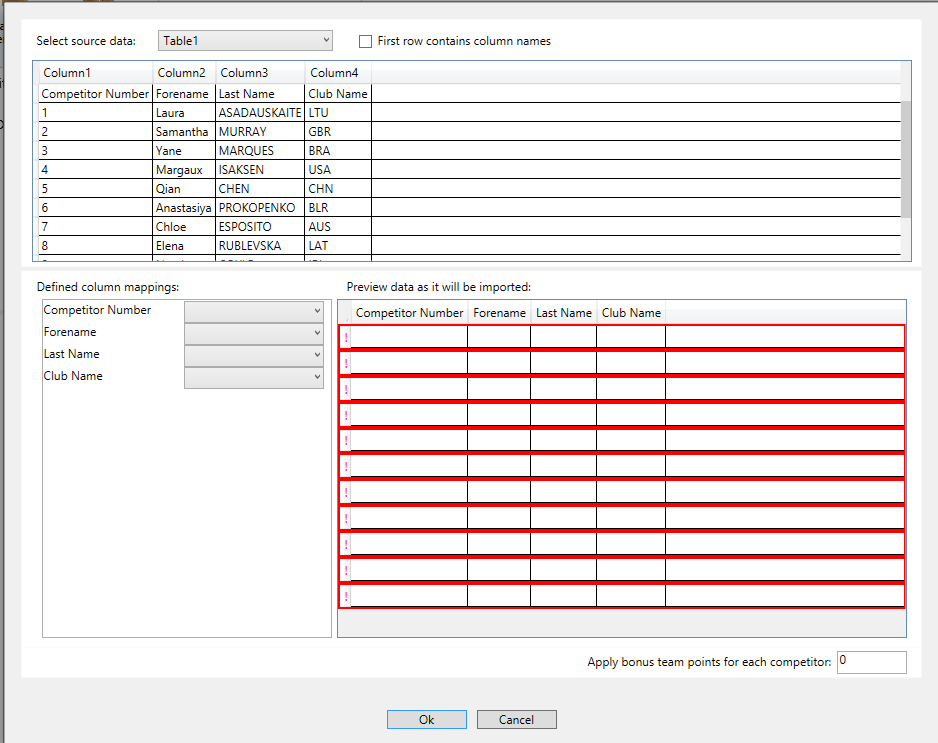
- Click the "First row contains column names" checkbox. Note that the columns are automatically mapped in the bottom-left-hand pane and the imported competitors can be previewed in the grid displayed in the bottom-right-hand pane.
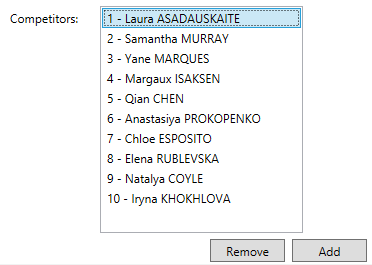
- Click OK. The imported competitors will be displayed as follows:
- Once Competitors have been added, teams can be created. This can also be done either one-by-one or from a bulk file import:
- Download this sample file containing a listing of teams.
- Click "Append Teams From File" button on the "Event Details" ribbon. The sample file will be read in and displayed in a dialog as before.
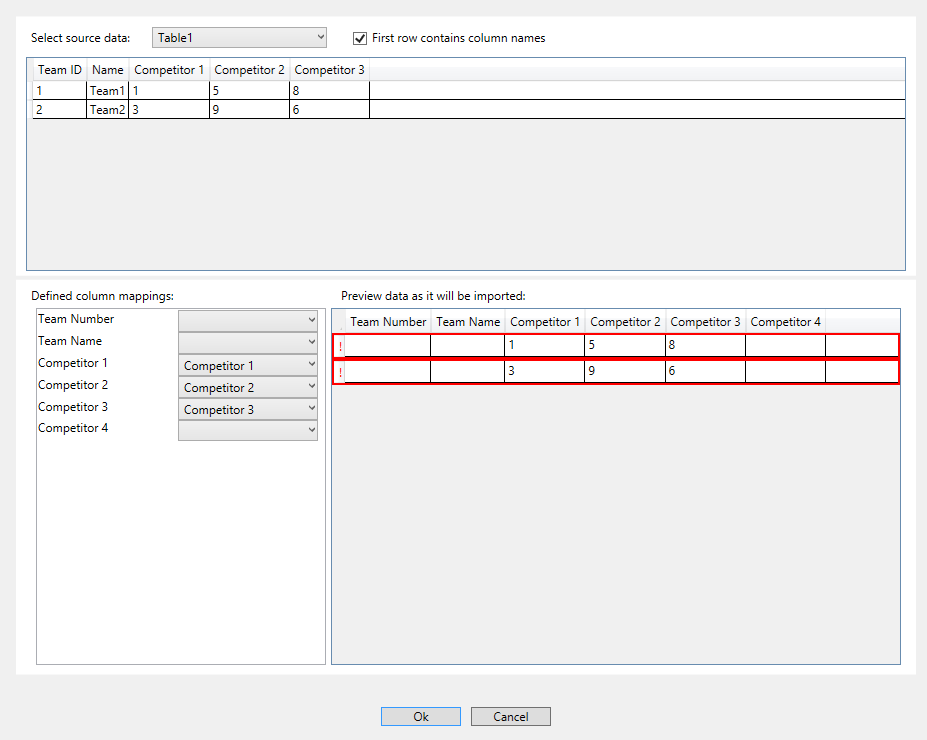
- Check "First row contains column names", this time note that only the competitor columns are matched. This is because they file columns headers are "Team ID" and Name", rather than "Team Number" and Team Name. Also note that the grid shows the teams in red, they will not be imported unless the issues are first addressed.
- Not to worry; use the dropdowns in the column mappings pane (bottom-left-hand corner) to fix the mappings.
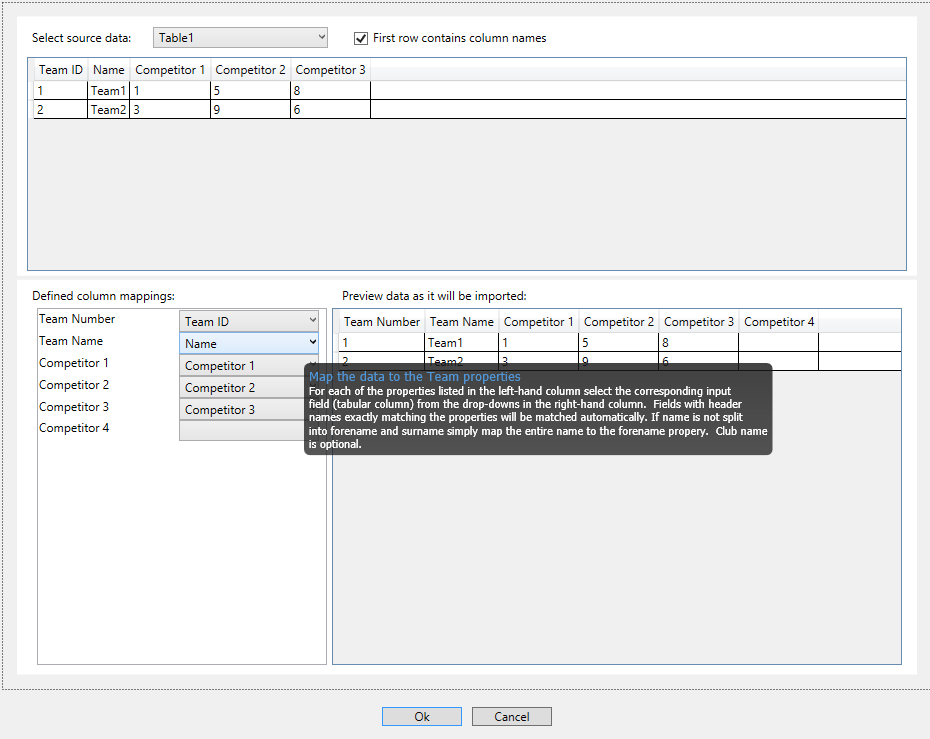
- The imported teams will be displayed as follows:
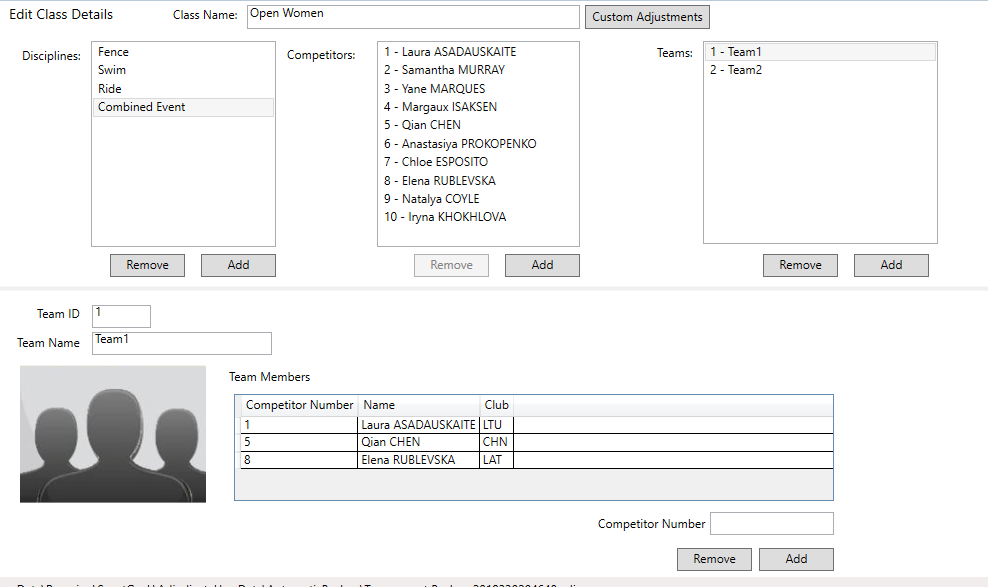
- Click on one of the teams to show its details as is demonstrated in the last screenshot. You can see that by entering a competitor number and clicking "Add" or "Remove" you can edit the teams from within Adjudicate.
- NOTE: Class teams can only contain competitors defined within the same class. However, it is also possible to create teams at the Competition node level using
competitors from all the classes listed under that competition. This may be important to consider with structuring your event into competitions.
- Now, once you have repeated this for all classes in the competition, this completes all the pre-competition day preparation. Note that Adjudicate is not yet able to produce paperwork such as swim slips or judges scorecards so for the time being the competition manager will need to produce these themselves.
- Click on the "Input Scores" Ribbon Tab. So long as the class you have selected in the tournament explorer has been set up you will see the following display. If you want to see the
input for a different class simply select it in the tournament explorer.
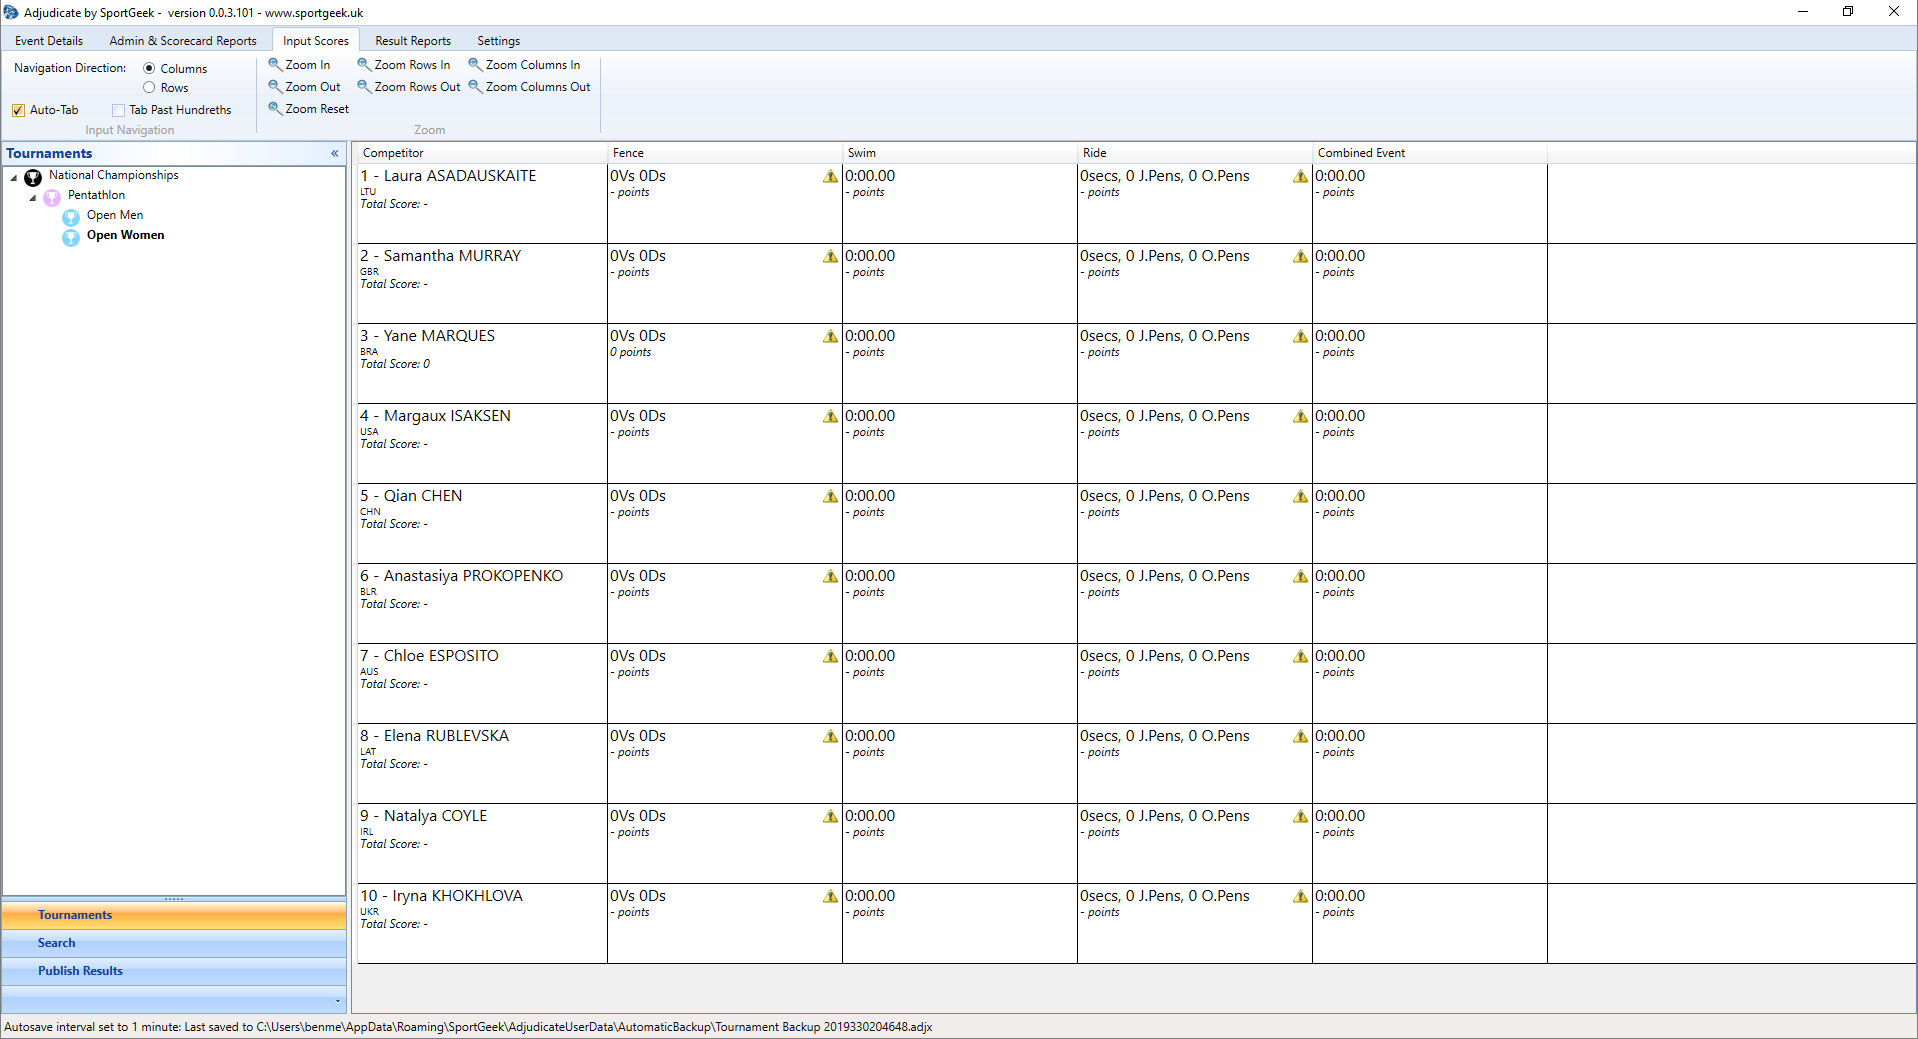
- Input is fairly simple. Summary information is displayed in each cell, when you click the cell this will be replaced with space to input reeults. The software will automatically detect when to move to the next cell when it is able to detect this and will navigate vertically down the columns by default. You can change these settings on the "Input Scores" ribbon.
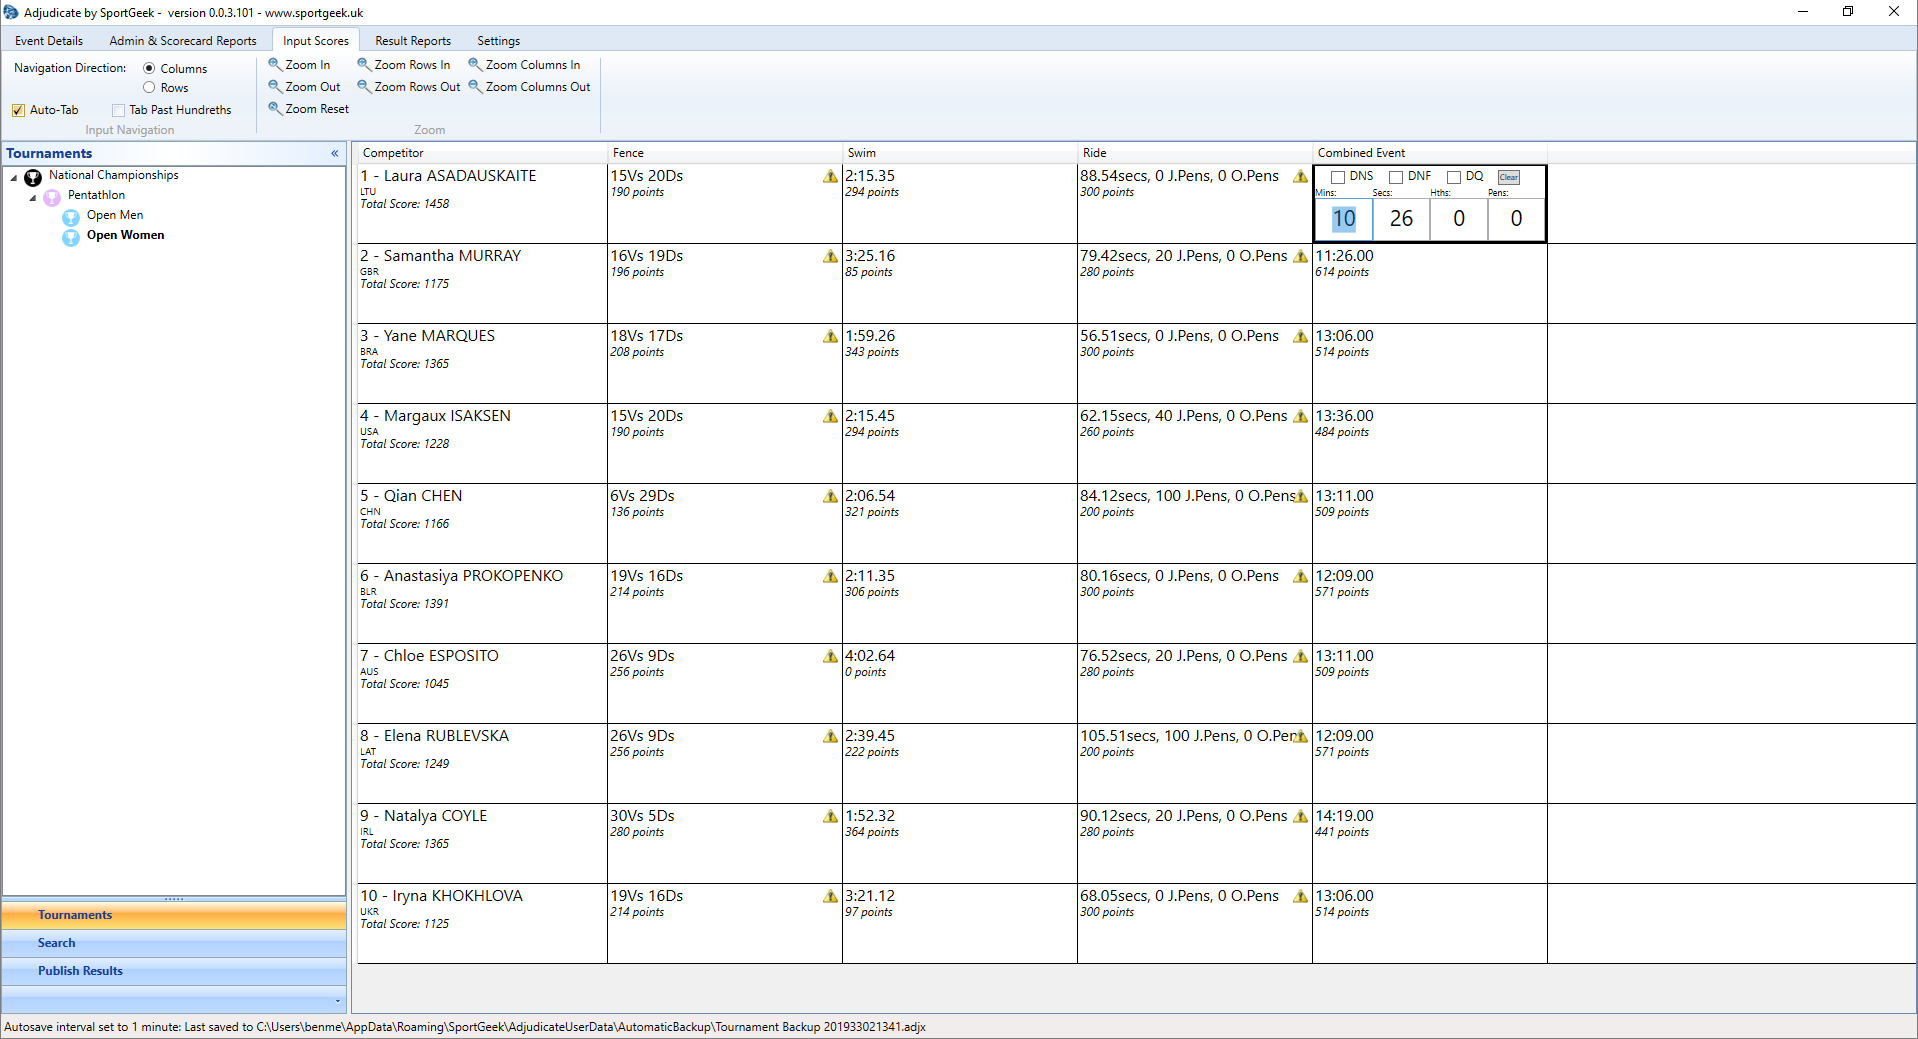
- Each box contains "DNS" (Did Not start), DNF (Did Not Finish) and DQ (Disqualified) checkboxes. When you start typing the grey header on the control surrounding the checkboxes turns to white to indicate that this competitor has a result for this discipline. The clear button resets the control to a pending state and clears the checkboxes.
- For the fence discipline you need to enter the victories and the number of bouts for each competitor (use the "override bouts" option for the moment, in the future you can set up the fence bouts and this will then be calculated for you).
- For the swim discipline, a time is required.
- For the ride, a time (in seconds), the jumping penalties and any other penalties accrued are required. If a horse list has been set up for the course to which the competitor belongs then this can also be selected. You must also remember to pop back to the ride details (via the "Event Details" ribbon), select the relevant course and enter the optimum time as this will not generally be known in advance. For the moment we haven't set up any courses so this will need to remain blank.
- For the combined event discipline, a time is required.
- You can enter all the data as the competition happens. This screenshot is of some made up data, not based on a real competition:
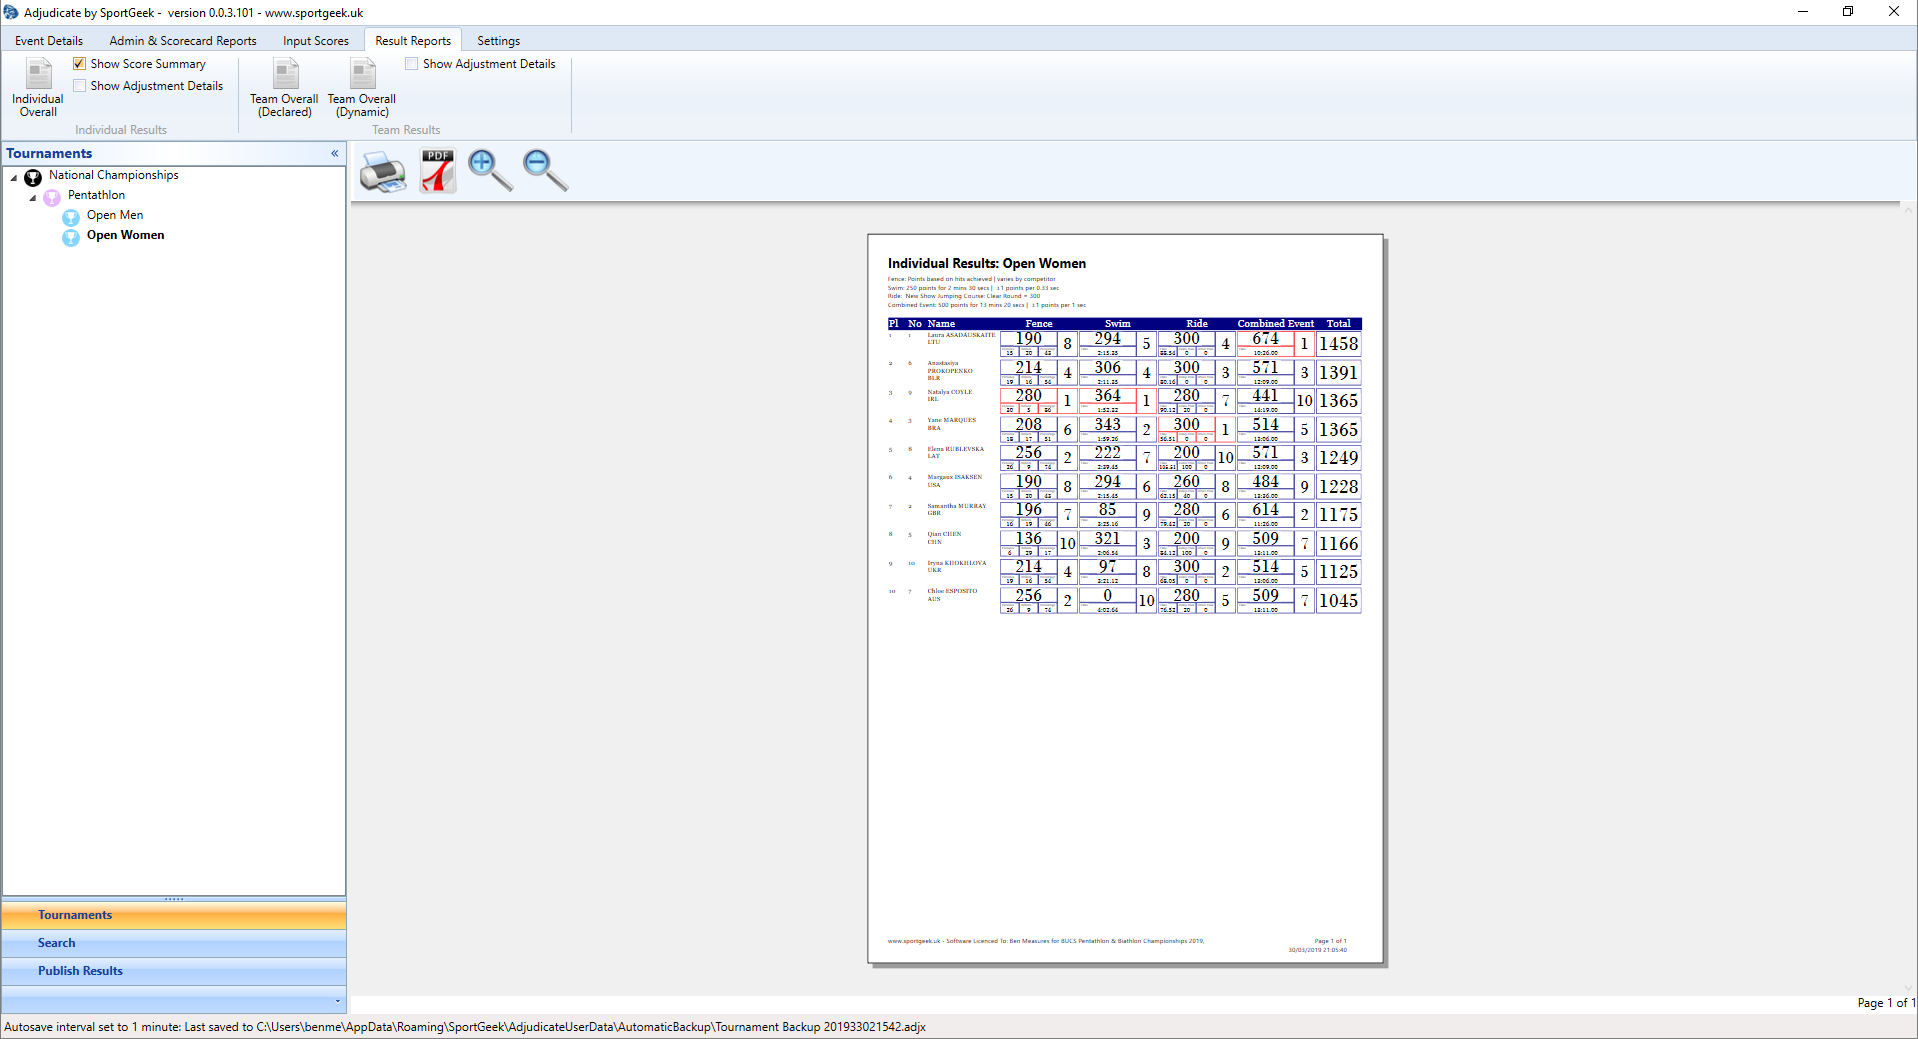
- Now select the "Results Report" ribbon tab and you will see three buttons and some other settings:
- The "Individual Overall" button, click this to display the individual results.
- The "Team Overall (Declared)" button, click this to display the Team results. The declared team results are based on those defined when we imported the teams, the dynamic teams are generated automatically based on the best three competitors from each club in team A, the the next three in team B and so on.
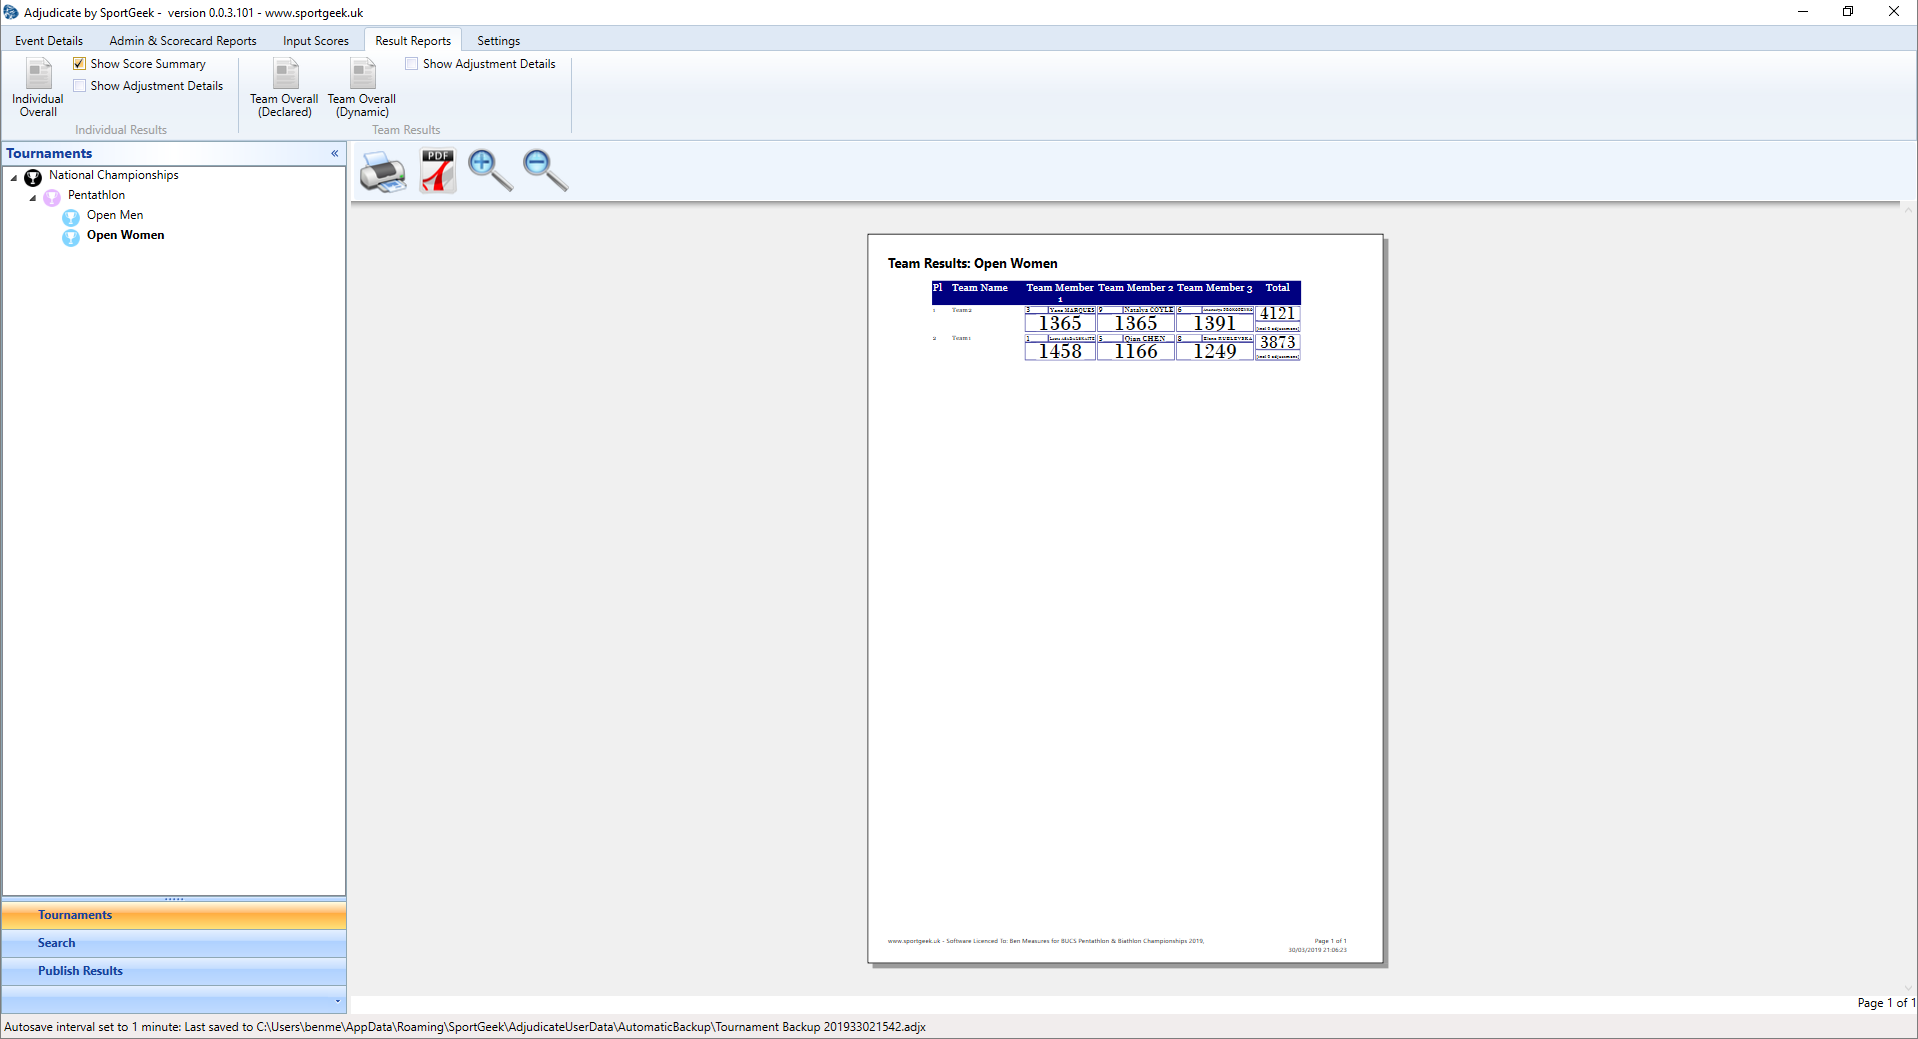
- The "Individual Overall" button, click this to display the individual results.
- The results can take a few seconds to generate (or even 10 or more seconds on a slow computer with a lot of competitors). A fast graphics card can help with this.
- Results can be printed via the print button on the results viewer control toolbar. To generate a PDF you will need a PDF print driver, we have had most success with PDFFactory but free alternatives exist if you search on the internet.
That is about it! The event structure can be altered at any time so if you notice you have something wrong or want to tweak a rule on the day of the event you can change anything and just regenerate the results report.
Other Information
Saving Your Progress
You can save your current tournament to a .adjx file from the "Save Tournament" button on the "Event Details" ribbon and open the file back again from
the "Open Tournament" button on the "Event Details".
Each time you close Adjudicate a copy of the current tournament is saved to "C:\
Automated Backups
Adjudicate is set to automatically backup your data every 60 seconds by default. These backups are stored in the "C:\
Further Information
Once you are happy with the basics as described here refer to the detailed functionality guide to discover more of Adjudicate's capabilities.